Pages

Friday, 3 February 2017

Console table

I was recently asked to make a console table from recycled timber along the lines of this one seen recently by my customer in Burford Garden Centre


I phoned round all the architectural salvage yards within driving distance and found these mahogany billiard table legs which seemed to be a good starting point:


 From the same yard I also got three pine scaffolding planks for the top and to build up the height of the turnings, also some tongue and grooved pine floorboards for the base.
The planks had to be glued together to get the required width:


Then I mocked up the pine slabs with the turnings to get an idea of final shapes/proportions:


The slabs were squared up and flattened then had a moulding routed on to add a bit of detail.
I decided to join everything together by drilling a hole into each end of the turnings and gluing in a 20mm threaded steel rod with epoxy resin.  The square slabs would be drilled to fit the rod and held in place with a locking nut.


Next more scaffold boards were used to make a rectangular frame for the base which was then covered with floorboards:
With the component parts made it was now time to sand everything and use strong bleach to try and match up the colours.  Starting with the dark mahogany turnings which first had to be stripped of the dark varnish:


I repeated the bleaching four times in the end, each time they got a shade lighter:


Then the other parts were bleached and some of the lightest pine was darkened a bit using caustic soda as a chemical stain.  Either vinegar or baking soda was then used to neutralise the wood before hosing it all off.


Then it was assembled using the steel rods:


 Then a final sanding and the top was darkened a bit with some water stain before finally finishing with two coats of matt finish.


I was later sent this photo of it installed in the living room:


Wednesday, 21 September 2016

The ash chest is finished.

The ash chest is finished and here's some photos of the last stages of its construction.

The bottom boards are fitted.


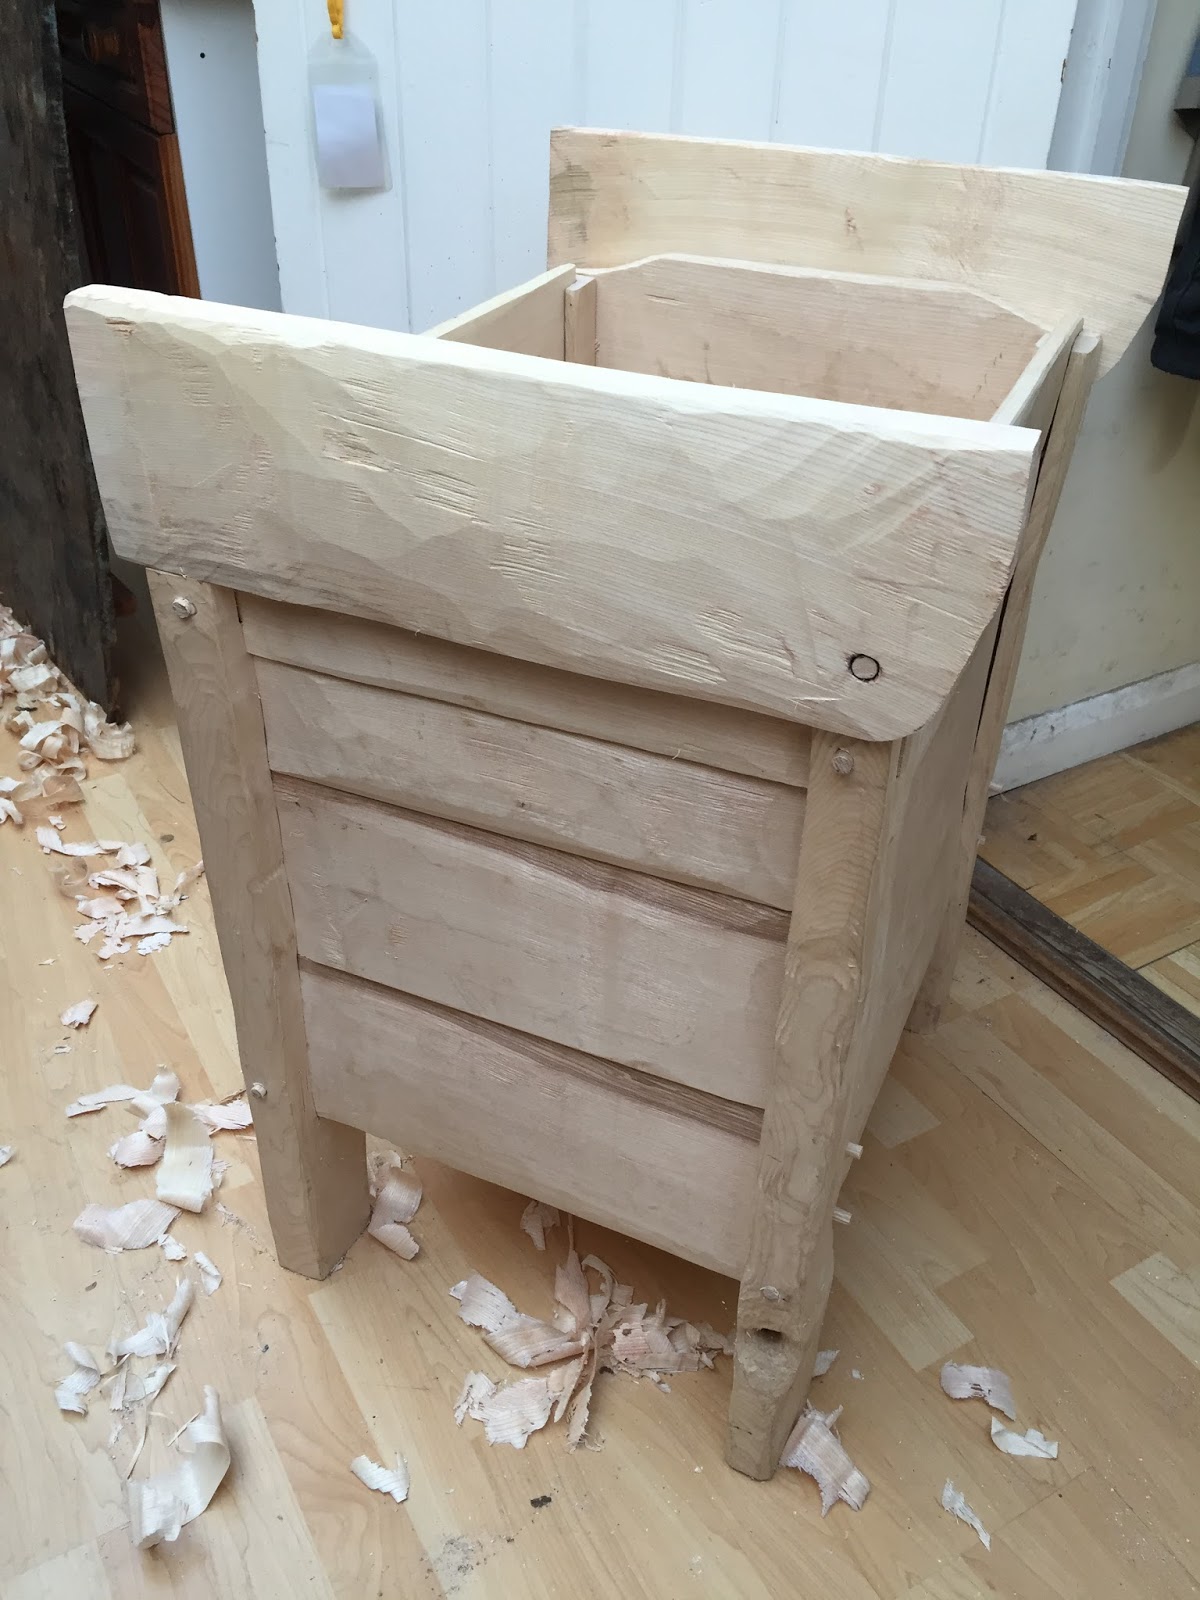
The long boards are fixed with draw-bored dry pegs.

Another long board is fitted...
...and one on the other side
The top long board on the back of the chest has been left longer than the others to allow the formation of the hinge pegs

With all the boards fixed it's time to make the lid...

...starting with the two lid sides which are fitted onto the hinge pegs.


The middle board is through tenoned along its whole width


The other two boards are fitted into a groove in the lid's side boards as well as having part of their width as a through tenon.

The lid sides are shaped for decoration and to allow pegs to be fitted from above, fixing all the tenons in place.


Finally all the pegs are trimmed flush, I carved my name and date inside the lid...


...and the outside was finished with a couple of coats of beeswax polish. 
Thanks to Peter Follansbee for posting the video of the Hungarian woodworker making a riven chest which enabled me to make this one.  Also to Tamas Gyenes in Hungary who I think sent the video to Peter originally and who has been kind enough to answer a few of my emailed questions concerning details of construction.

Monday, 18 July 2016

Riven ash chest or stollen truhe.

Having watched the 1955 black and white film of a Hungarian riven chest maker at least 20 times [here's a link to it https://www.youtube.com/embed/3V0gQ9M45G8 ] I decided to have a go myself.

My ash tree was not very straight so the boards needed to be riven quite thick before hewing and draw knifing to a useable size, which meant lots of hard work on the shaving horse!

Here's a few photos showing various stages of construction:
The shaving horse is used to hold the timber while it is shaped with the draw knife
The grooving tool is used to make a groove on a side board which will receive the edge of a bottom board.
Here a leg is grooved to receive the side boards.
Four grooved legs.
Two side boards, each grooved on one edge and tapered on the other to act as tongue-and-groove joints
These pegs or trenails were riven from the ash then baked dry in my oven overnight.  Then shaped with a knife and hammered home into a draw bored mortise and tenon joint to hold the sides together.
The next step is to make the bottom boards.  Usually these chests have bottom boards which run from side-to-side.  So that I can use shorter timber I think I'll run them front-to-back [which I have seen done in a photo of one old chest]. I suppose shorter boards would be stronger too.

Saturday, 11 June 2016

Ash log

I got hold of a lump of ash recently.  The tree was threatening a stone barn so its 150 year life was brought to an end.  I'm not sure what I'll end up making with it yet, maybe a riven chest  like the ones being still being made in the old tradition by Tamas Gyenes [and seen in the old 1955 video here: https://www.youtube.com/embed/3V0gQ9M45G8 ].
Anyway the first step was to rive it into moveable bits which I could get in my van and bring back to the workshop.  It didn't crack open as easily as the european beech in the video but I managed it eventually.